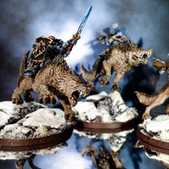
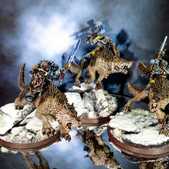
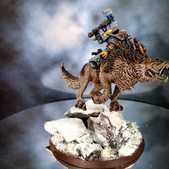
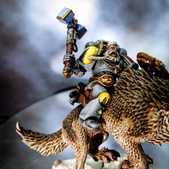
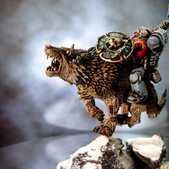
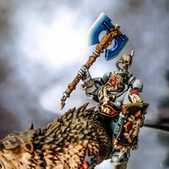
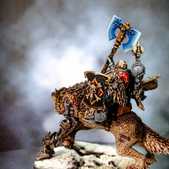
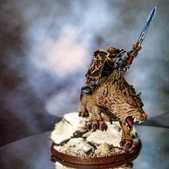
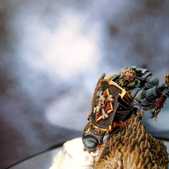
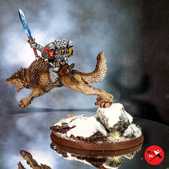
From the Mountains of the Maelstrom come the legendary Thunderwolves, hulking beasts with jaws so strong they can chew through steel. There are several known instances of senior Space Wolves tracking down and ‘breaking in’ Thunderwolves, and this practice, thought to be an initiation ritual into the upper echelons of the Wolf Guard, has given rise to the near-mythical Thunderwolf Cavalry - a small but dauntless elite within the ranks of the Wolf Guard who remain absent from any official Imperial records.
Miniature Review
Having painted the first full unit I wanted to move away from infantry and paint something truly Space Wolfy, and what's more wolfy than giant wolves?
As they're quite large miniatures I drilled holes into their feet and attached cut down paperclips into the base, so they slot on and can easily be removed for transportation. I also magnetised the legs to each wolf, so the riders can be removed. I did the same with the bodies, so I can swap out the weapon options in the future if I want to.
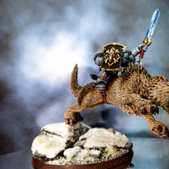
It was fun building bases that matched their poses as there's a lot of movement in the wolves, and I wanted to give the more dynamic poses some height as they leap forwards. I also wanted to have each marine holding on with their shield arm, while holding their weapon high as part of the charge.
The cyber parts of the wolves such as the bionic leg and eye also adds some fun futuristic detail without going too far.
Painting Techniques
Armour
Fenrisian Grey is applied as an edge highlight and Blue Horror as an extreme edge highlight.
Pelts
Ushabti Bone and Screaming Skull can be swapped out for Tyrant Skull and Terminatus Stone. For fur apply the shade more heavily in the center.
Bone & Fangs
Alternatively use Zandri Dust, Reikland Fleshshade and Screaming Skull for a slightly different look.
Red Armour & Leather
Brighter colours should be applied where the light would reflect the most, or parallel to edges when painting pack markings on their shoulders.
Runic Stone
Runes & Lenses (Blue)
Lenses & Gems (Green)
Skin
Agrax Earthshade is thinned down and only applied to the deepest recesses. Carroburg Crimson is applied in the recesses around the eyes and nose.
Beige Hair
Steel
Power Weapons
The sword was painted by treating each half as opposites. On the left side the white is at the top, and the darkest blue is on the bottom, while on the right side this is reversed. I then broke down each side into quarters, painting each with their respective colour. For the other weapons I painted the darkest blue at the base of the weapon, with the white along the edge of the blade or hammer.
To blend each adjacent quarter I mixed the two paints together and applied it in the middle. I then repeated this over and over, always saving a bit of each mixture, until achieving a smooth transition. A final edge highlight of White Scar was applied.
For the plasma coil I also applied a wash of Drakenhof Nightshade after the base layer to create more of a contrast. The brighter blues and white were focused on the raised areas and towards the center of the coil. This could be reversed to create a different effect, with the inner coil being brighter showing the heat generated internally.
Weapon Casings & Seals
Mechanicus Standard Grey is applied as an edge highlight and Administratum Grey as an extreme edge highlight.
Gold
Cloth & Parchment
Purity Seals
Screamer Pink, Emperor's Children and Nuln Oil can be used instead to differentiate from other reds.
Leather
Yellow Armour
Thunderwolves
Fur
Only apply the Reikland Fleshshade to the top darker parts, and the Agrax Earthshade within that. The Karak Stone is used to lightly highlight the darker areas, while the Tyrant Skull should only be used to highlight the lighter areas. The Bestigor Flesh was used to highlight the areas between light and dark to create a transition. The Longbeard Grey and Screaming Skull is used to highlight areas such as the ears and lightest parts of the fur.
Gums
Bionic Eye
Basing
I cast some Fantascape Glacial Ruins bases using Instant Mold & Milliput, then glued some sand around the edges, applying a second layer of watered down PVA to help it stuck.
Stone
The Seraphim Sepia was applied in patches to give a dirt stained look.
Ice
Dirt
Base Edge
Finally, I applied some Mordheim Turf tufts and then a couple of layers of Deluxe's Scenic Snow.
Roundup
Painting the thunderwolves was really quick and fun, good for breaking up painting power armour and especially blending power weapons. I ended up painting their noses in the same way as human flesh, but I might make them black in the future as they don't look quite right after some reflection.
I tried to drybrush some of the highlighting on the armour, but I don't really like the effect. I might go back over it at some point, but for now I want to keep moving and start on the next unit!

